Adding contacts makes is easier to not only send messages but also to track replies. In your inbox, messages received by your contacts will appear with the name of the contact as the sender, as opposed to just the mobile number. You can also add contacts to groups, making it easier to send bulk messages.
To create individual contacts:
1) Click on Contacts, then All Contacts, then click New Contact
2) Input the required information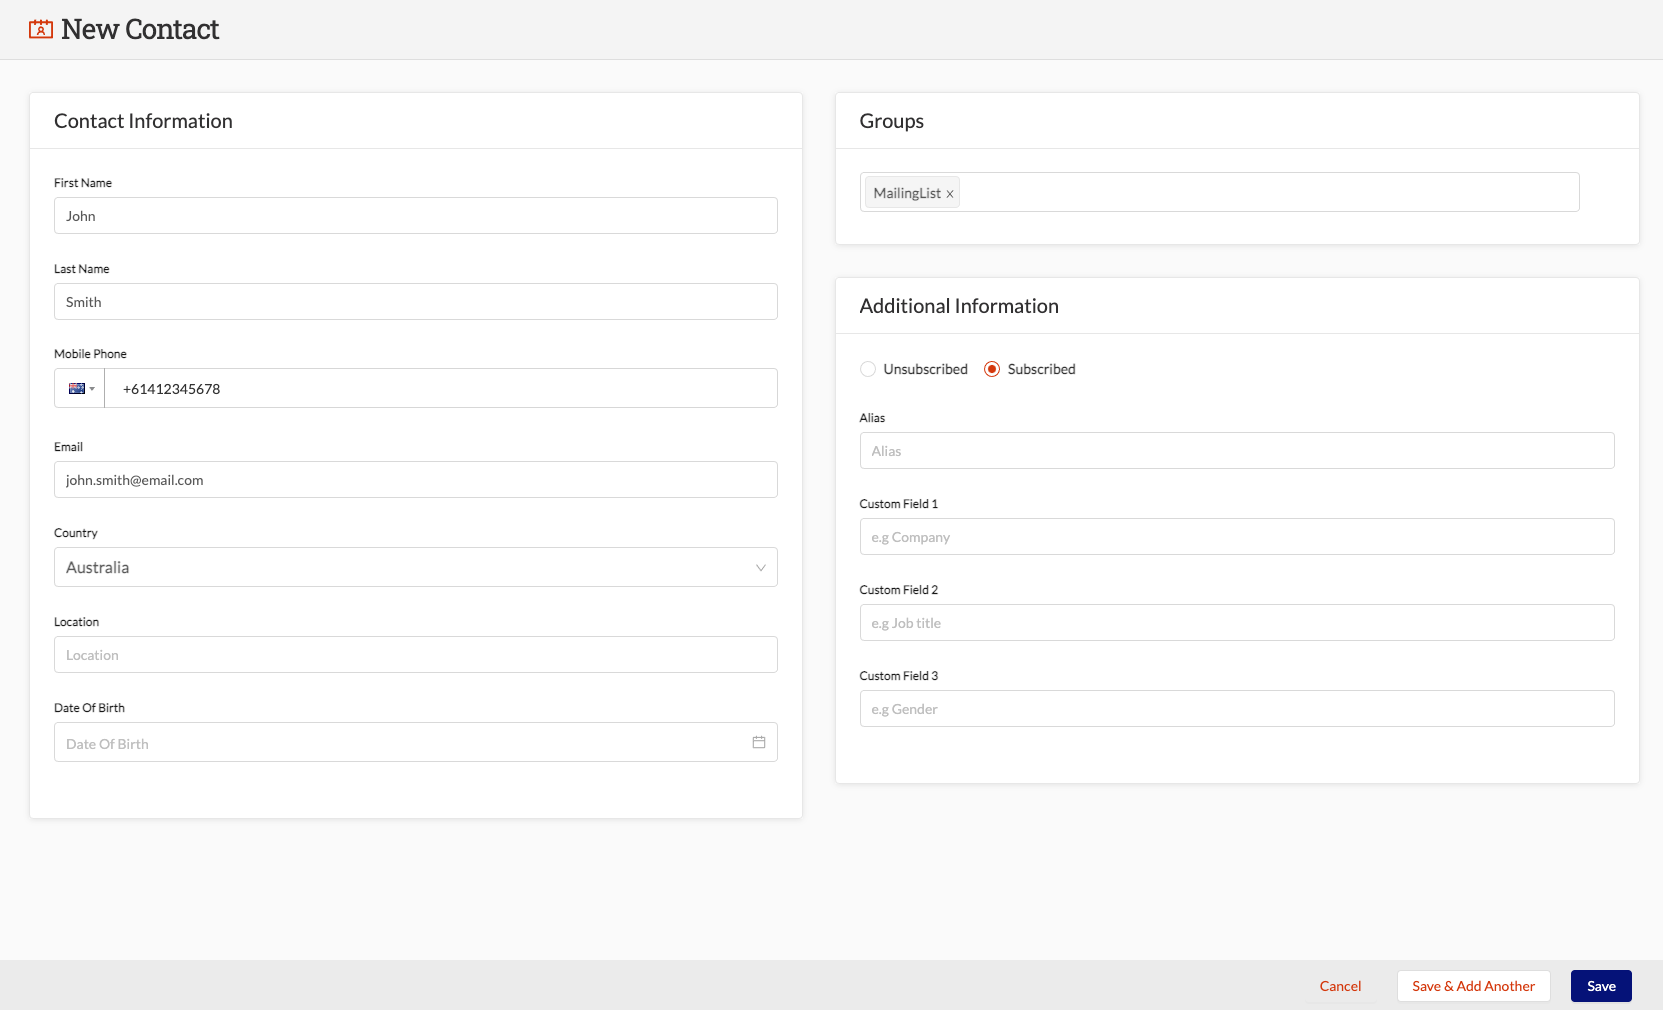 In the left-hand table, the fields available are as follows:
- First Name - the first name of the contact
- Last Name - the surname of the contact
- Mobile Phone (required) - international format required. The country should default to the associated account's country.
- Email - email address of the contact
- Country - country associated with contact
In the right-hand table, additional information can be entered:
- Groups - Select one or more Contact Groups (groups must be created prior to creating the contact)
- Additional Information- Provide additional information (if required):
- Unsubscribed v Subscribed (a contact will be subscribed by default. Selecting Unsubscribed will prevent messages from being sent to this contact)
- Alias - used as an alternative name for your contact, as well as for email to SMS
- Custom fields (x3) - can be used if you have other relevant information on your contact that you wish to record or use in message personalisation
NOTE: You can use the Email and Location fields to store any information you like, as they are free text fields. This means that in essence, you could store up to five fields of custom information to use in message personalisation.
4) Click Save
Your contact will now appear in your "All Contacts" list, and if you added them to a Contact Group, they will appear in the relevant Group as well.